07c. Mini-Map Area & Layers Toolbox Controls
Overview
These three areas are normally on the top right sidebar once you have a map created/open. However, if you have “Use Toolboxes” on the right side of the menu bar checked, each must be opened by clicking the button corresponding to that toolbox. Hovering over a button will tell you which it is.
If not using toolboxes, the mini-map area is always shown at the top, while the other tabs allow you to edit Terrain, Features, Shapes, Labels, and Layers; as well as use the Fog of War and Trace Underlay functionality.
Floating Dialogs vs. Tabs
Note: You can have floating dialogs instead of tabs using the buttons in the top right of the menu bar. The functionality within the floating dialogs is the same as the tabs. In either case, we’ll refer to them as toolboxes. Pre-2025 Worldographer uses Drawers instead of Tabs, but it does also have Floating Dialogs.
Mini-Map Area
The mini-map area’s main feature is a small version of your map with a rectangle inside showing you the area you’re viewing. It also has some tile sizing controls:

Mini-Map
A small view of the current map. The greenish rectangle is the section of the map your main map view is displaying. You can click and drag the rectangle to move the main map’s view.
Pan Button
When selected, you can click and drag the main map to move the map around. But by default clicking and dragging your middle mouse (wheel) button while over the main map area will let you pan as well.
Refresh
Refreshes the mini-map view in case you’ve made significant changes and it hasn’t refreshed yet. By default, it refreshes every 2 minutes.
Zoom (Plus/Minus) Buttons
The Plus button zooms in on the map by 50%. (If the tiles’ width is 40, it will become 60.) The minus button zooms out by 25%. (If the tiles’ width is 60, it will become 45.) The system keeps the map view centered.
Tile Width & Height
The width and height of each individual hex or square on the map in pixels. Change these to zoom in or out. (You can also use the plus/minus buttons described above or the scroll wheel on your mouse as you hover over the main map.)
Preserve Aspect Ratio Checkbox
If checked, when you change the Hex Width & Height, the other value will change proportionally.
Level Drop-Down List
(Requires the Pro version.) This only shows for world/kingdom maps. It allows you to jump to a new version of the same map with many more or fewer hexes per hex in the current hex. See the Map Levels section on the Creating World/Kingdom maps page for details.
Layers Toolbox
The Layers toolbox allows you to configure which map features/shapes/labels/terrain/etc. appear above or below others. You can also turn layers on or off to hide groups of features. To assign a feature, shape, or label to a specific map layer, look for the “Layer” control on the matching toolbox (ex: the Features toolbox for a feature). Select the map object, then use that Layer control to move it to the layer you want to use.
Here is what the Layers toolbox looks like:
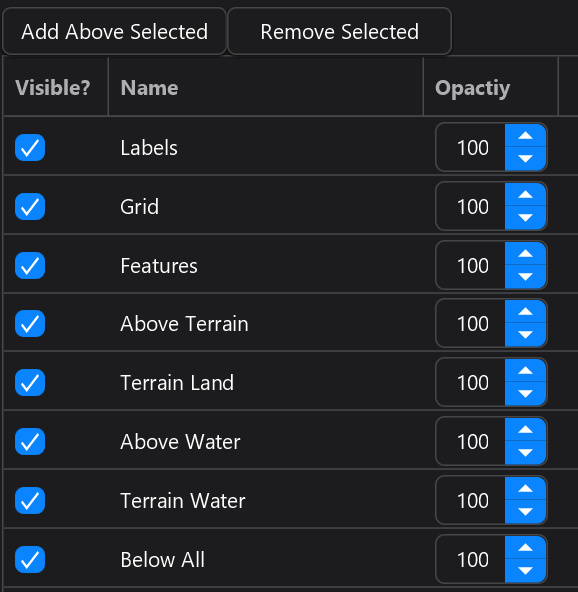
Add Above Selected
This button adds a new layer above whichever layer is currently selected. It will prompt you for a name of the new layer. If no layer is selected, the new layer appears at the top of the list.
Remove Selected
Removes the selected layer from the list and from the layers of this map, after prompting you for confirmation. Note: Any map objects on that layer are also deleted.
Visible? Checkboxes
Turn layers on or off (don’t display them) via these checkboxes.
Opacity Number Spinners
These allow you to set how opaque all the objects on that layer will be. This is not available prior to the 2025 version.
Reorder Layers
You can click and drag a layer in the list to reorder it.
Rename Layers
This is not available prior to the 2025 version. Click on the name of a layer and then click it again and it will highlight. Type in a new name and press enter/return to submit the name change.