“Importing” a Donjon Fantasy World Map Into Worldographer
Recently someone in our Discord asked for help importing a Donjon fantasy world map into Worldographer. While we don’t have a direct way to import their maps (nor do I think they provide the raw data) you can trace the map. And it can be pretty easy.
Get the Map Image & Setup Worldographer
- Go to the donjon Fantasy World Generator website, create a world map, and save the image file to your computer.
- Open Worldographer, go to the File menu, and pick New World/Kingdom map.
- In the large “World/Kingdom Setup Screen” dialog, set “Hexes Wide” to 200 and “Hexes High” to 86. This seems to be the default size of a donjon world map. Map sure “Hex Orientation” is “Columns Line Up” and “Map Projection” is “Flat”. On the right of the setup screen, pick “All One Terrain” and select “Blank” for the terrain type next to it. The other settings aren’t used. Then click “Generate Map” on the bottom.
Set the Image as the “Underlay” to Trace
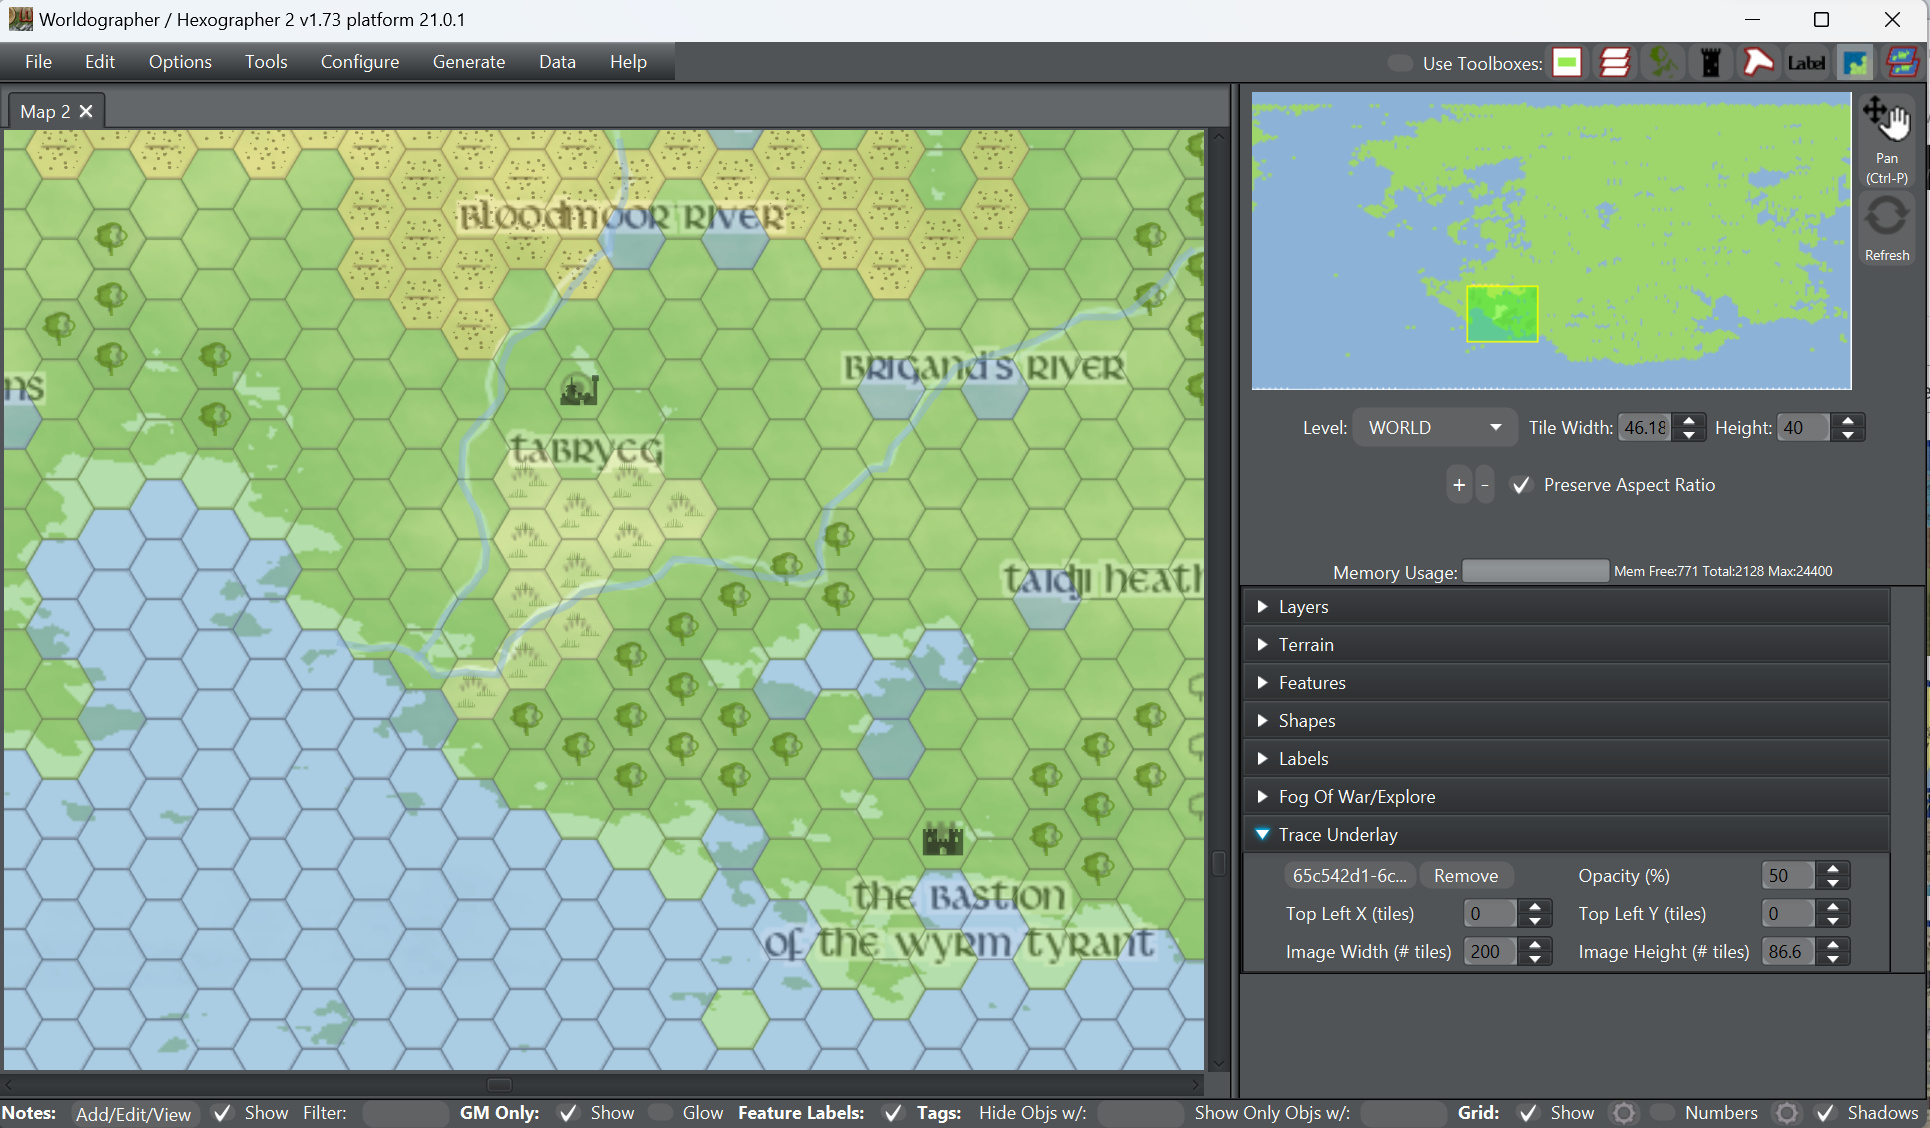
- Now we’ll set the donjon map up to trace it. In Worldographer, go to “Trace Underlay” on the right side. Use the file chooser (initially it says “Choose File” to select the image file you saved. Set Opacity to 50% (so you can half see the map you’re making and half see the image you’re tracing. Set “Image Width” to 200 and “Image Height” to 86.6. (It is 86.6 because of the staggered columns of a hex map, and the donjon image has a little sliver of extra image area on the bottom.)
- At this point you should see the donjon map, and you can go to the “Terrain” drawer in Worldographer to place terrain; use the “Features” drawer to add icons for cities, castles and so on; use the “Shapes” drawer to draw rivers and refine coastlines; and use the “Labels” drawer to add map labels. I often find myself switching back to the trace underlay drawer occasionally to adjust the Opacity–at times I want to better see the map I’m making, and at other times I want to better see the image I’m tracing.
Potential Time-saver!
But Wait! We also have a “Convert Underlay” feature on our “Tools” menu. It tries to pick a terrain for each hex based on the color in the image below that hex. Because the donjon maps use a fairly flat color palette and forest, grassland, and desert (for example) are almost the same color–they are marked mostly by icons–it is best to simply convert the map to just farmland & sea/water. Then do the rest by hand.
So when you open “Convert Underlay”, pick the “Classic” icons from the first dialog, then de-select all the terrain from the next dialog that shows what terrain will be used except “Farmland” and “Water Sea”. This should get you close to a map that is farmland over any land in the image and sea over any water in the image. Occasionally an icon or a label can throw off the algorithm and you’ll get water where it should be land or vice versa, but these are easy to fix.
And after that, you just use the Terrain, Features, Shapes, and Labels drawers to refine the map to match the image. As mentioned above, you can always go back to the Trace Underlay drawer to change the opacity if you’re having trouble seeing a detail in the map you’re making or the image you’re tracing.